|
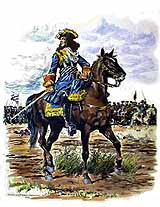
The
Army of Prince Maximilian II Emanuel Wittelsbach
Elector
of Bavaria
|
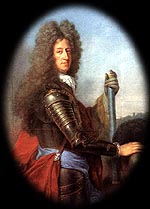
| The
Wittelsbach principality of Bavaria had been the center of the Catholic
League during the Thirty Years War. Although a state of the Holy Roman
Empire whose elevation to the electoral dignity during the early stages
of the war provoked anger and fear among the Protestant princes, Bavaria's
"League" armies often rivaled the size and importance of those of the Holy
Roman Empire itself.
By
the turn of the century, Elector Ma Emmanuel II, also known as "The Blue
King" for the Willelsbach blue of his infantry uniforms, was an experienced
and renowned soldier. He had led one of the more important contingents
to the relief of Vienna from the Turks in 1683 and fought through the subsequent
Turkenkrieg. Again, in the War of the League of Augsburg he had supported
the Holy Roman Empire against France. However, by the War of the Spanish
Succession Max had been won over to the French Side. He was one of the
few Princes, certainly the most important one, to support the claim of
Philip of Anjou, nephew of Louis XIV, to the Spanish throne. At one time,
in fact, a Wittelsbach Prince Joseph Ferdinand had been agreed on by the
major powers as heir to the Spanish throne. Unfortunately, for the millions
who would be inconvenienced by the War, Joseph Ferdinand predeceased Charles
of Spain.
From
Wargaming in the Age of Marlborough #2 Danes, Bavarians and Prussians,
by Pat Condray.
|
|
|
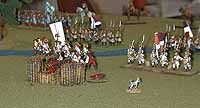
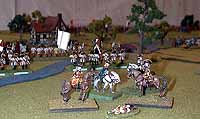
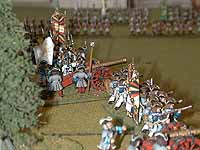 French
Battalions, "En Crochet" Twelve French battalions, under the command
of the Marquis du Rosel, deployed in the wood line in a hook shape (en
crochet) to conform to the wood line on the high ground of the French left.
Seen approaching in the distance are the Danish battalions that eventually
repulsed them. French
Battalions, "En Crochet" Twelve French battalions, under the command
of the Marquis du Rosel, deployed in the wood line in a hook shape (en
crochet) to conform to the wood line on the high ground of the French left.
Seen approaching in the distance are the Danish battalions that eventually
repulsed them.
See
Maximillian Photo Page 1 |
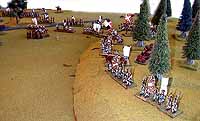 Twelve
12lb Artillery Batteries were deployed in front of this line (seen
here from the Danish position) and also along the base of the hook that
extended in two lines across the front of Lutzingen, which is not on the
battlefield. These are represented in the game by 3 stands of medium guns. Twelve
12lb Artillery Batteries were deployed in front of this line (seen
here from the Danish position) and also along the base of the hook that
extended in two lines across the front of Lutzingen, which is not on the
battlefield. These are represented in the game by 3 stands of medium guns.
See
Maximillian Photo Page 1 |
 French
Medium Guns pose a formidable obstacle to the Danes who must advance
into them to assault the French position in the wood line. French
Medium Guns pose a formidable obstacle to the Danes who must advance
into them to assault the French position in the wood line.
See
Maximillian Photo Page 1 |
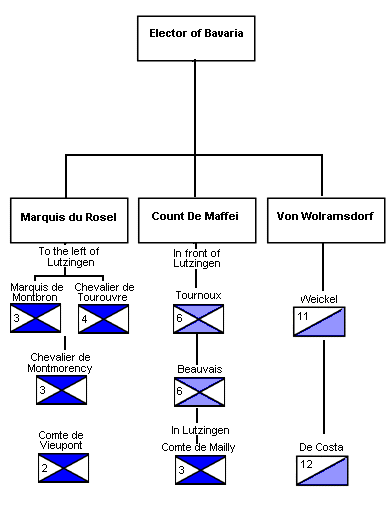
 Bavarian
Battalions are immediately to the right of the French positions, 12
battalions under the command of the Count de Maffei. These are lined up
opposite the Prussian Battalions. Bavarian
Battalions are immediately to the right of the French positions, 12
battalions under the command of the Count de Maffei. These are lined up
opposite the Prussian Battalions.
See
Maximillian Photo Page 2 |
 Bavarian
Regimental Artillery was, according to Rothenberg, larger than most
army's regimental pieces, as 6 lbers. However, most of Bavaria's 6lb artillery
pieces was captured at Schellenberg, so speculatively, we have assigned
4lb (from the French) light guns, 12 pieces (or 3 stands) to defend the
front of the Bavarian army. Bavarian
Regimental Artillery was, according to Rothenberg, larger than most
army's regimental pieces, as 6 lbers. However, most of Bavaria's 6lb artillery
pieces was captured at Schellenberg, so speculatively, we have assigned
4lb (from the French) light guns, 12 pieces (or 3 stands) to defend the
front of the Bavarian army.
See
Maximillian Photo Page 2 |
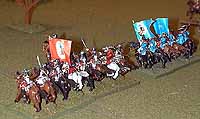 Bavarian
Horse The Franco Bavarian horse on the left flank at Blenheim was under
the overall command of the Count d'Arco. The Bavarian contingent of 23
squadrons were under the command of General Von Wolframsdorff. Bavarian
Horse The Franco Bavarian horse on the left flank at Blenheim was under
the overall command of the Count d'Arco. The Bavarian contingent of 23
squadrons were under the command of General Von Wolframsdorff.
See
Maximillian Photo Page 2 |
 French
Horse. The French 48 squadrons
were divided into two lines, but as we did with the Imperial Horse opposite
them, we group these into a left and right contingent. The right contingent
was not on this table segment and will appear as the left wing command
on the center table. The reason we divide them in this manner is to place
each command in the hands of a player that will have some figures to game
with, rather than being stuck in the second line French
Horse. The French 48 squadrons
were divided into two lines, but as we did with the Imperial Horse opposite
them, we group these into a left and right contingent. The right contingent
was not on this table segment and will appear as the left wing command
on the center table. The reason we divide them in this manner is to place
each command in the hands of a player that will have some figures to game
with, rather than being stuck in the second line
See
Maximillian Photo Page 3 |
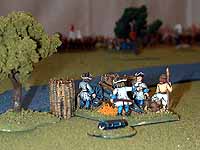
 French
Officers are shown in this view behind the left flan - no doubt discussing
their impending victory. French
Officers are shown in this view behind the left flan - no doubt discussing
their impending victory.
See
Maximillian Photo Page 3 |
|
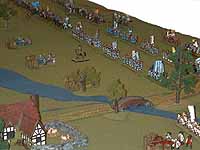
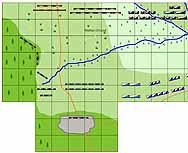
The Game Table.
This is the projected game table, each
square representing 1 square foot.
|
|
|
Click
on the map for a full size image.
|
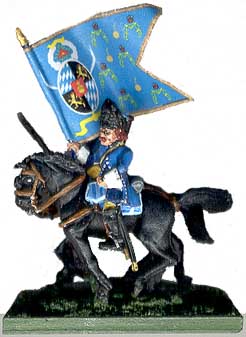
Bavarian Grenadier
Guard
Converted
figures by Ian Croxall - Salem Oregon
|
|
|
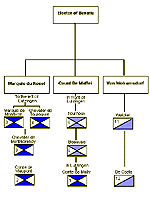
Complete
Orders of Battle
On
the Franco Bavarian left, Maximilian's army of 23 squadrons and 12 battalions
was combined with french units from Marxhall Marsin's army.
|
|
| Select
the image for a larger picture and description of the forces involved.
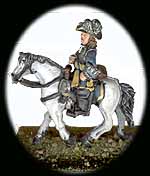
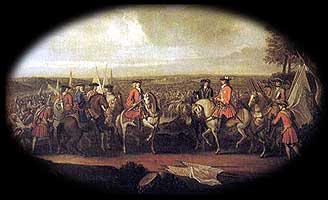
Hoffman
Plate
Maximilian
II
HOW
THE COMMANDS ARE ORGANIZED
Although
the commands are based on historical divisions in the army, we have made
a few changes to the layout in order to make the game more player friendly.
Those
wishing a full historical listing, the complete historical OOB as well
as a detailed, easy to read description of the battle would be well advised
to obtain a copy if Iain Stanford's essay on the battle - available from
the Pike and Shot Society
Marlborough
Goes to War
The
reader will note that many commands consist of an entire line under one
General, the second under another, and so - on. Unfortunately, this can
lead to a dull game for the player commanding the 4th line for example.
We solve that by dividing commands up so that player controls part of a
line but both the 1st and 2nd (and 3rd etc.) lines. This way, players along
a front all get to be involved. Our OOB reflects this change, so great
care should be taken by those who wishing to use the OOB for study purposes. |
|
|
RETURN
TO CAMP
|
|
|
|